Winter this year in Northern California has been very wet but rather warm. As result, the weeds have been sprouting like mad! While weeding, I became determined that we should not spend time in the garden only for weeding, but also on fun stuff in anticipation of warm(er) weather and sunny skies.
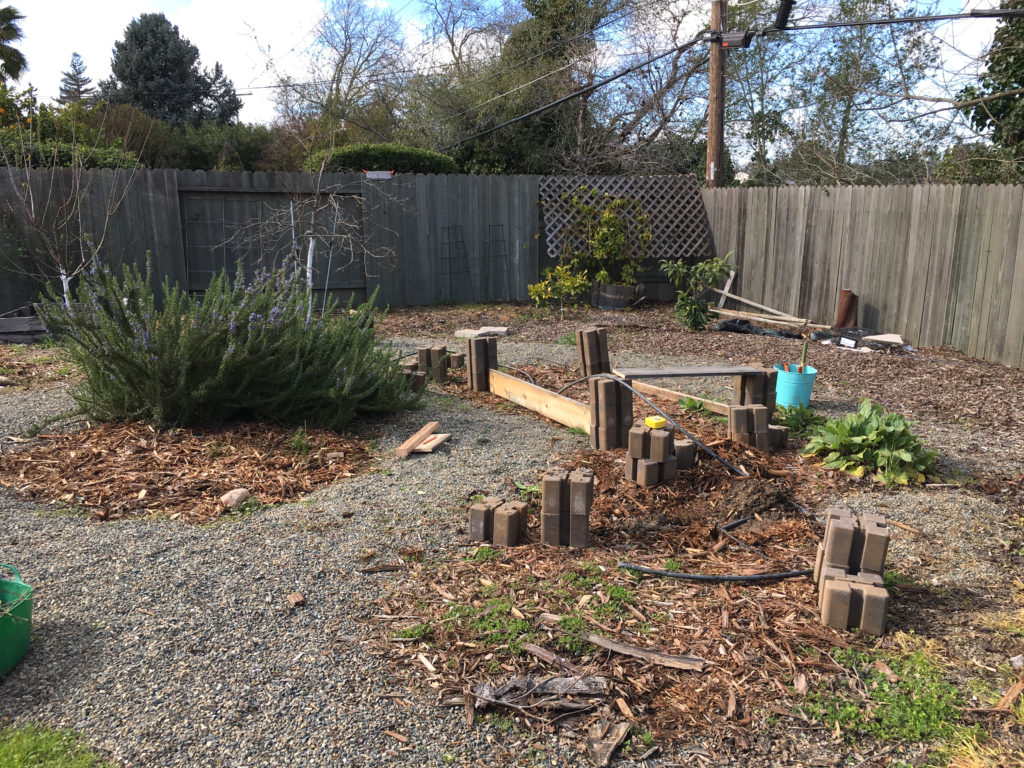
We’d been thinking of raised planters for a while. There’s an area of our yard that we’ve neglected over the years. I just noticed that I’ve never taken a picture of it specifically… I think it’s because it’s an area that I couldn’t make up my mind about and there was constantly weeds there, and we didn’t have time to fix it up before.
I’ve circled the area in yellow below:

From back of yard 
From front of yard
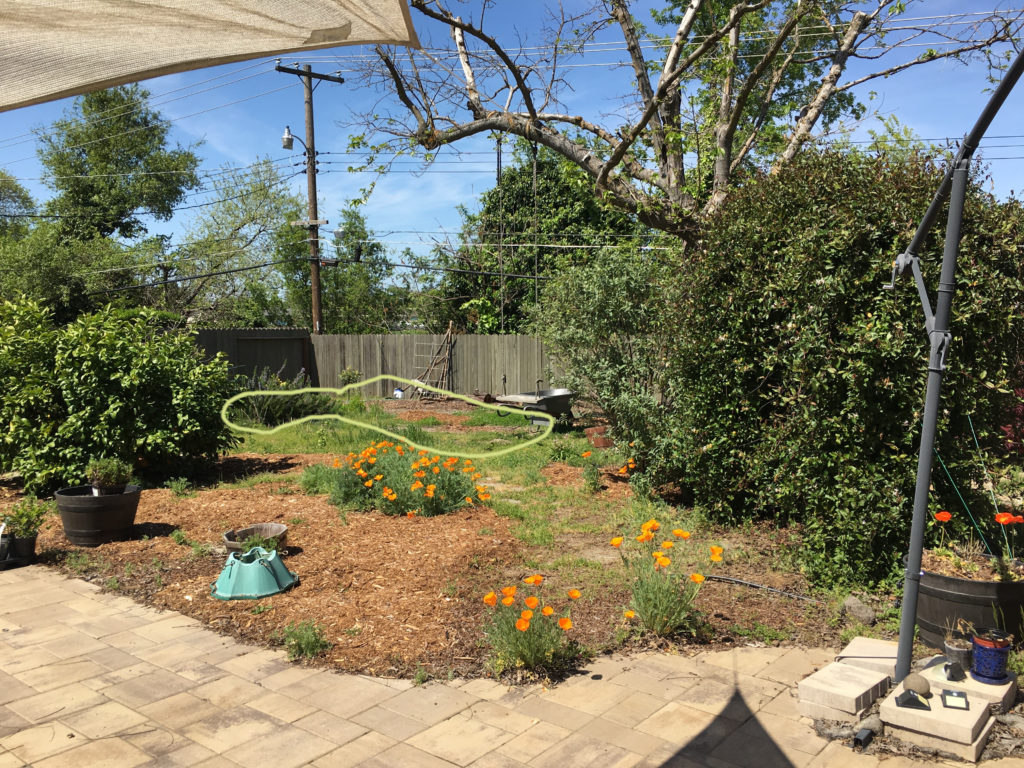
It’s actually a great spot… which is why weeds keep popping up there! Another impetus for building the raised planters is that the fruitless mulberry tree in the middle of our yard finally kicked it, and we’re removing it, which frees up a lot of space and morning light into this area.
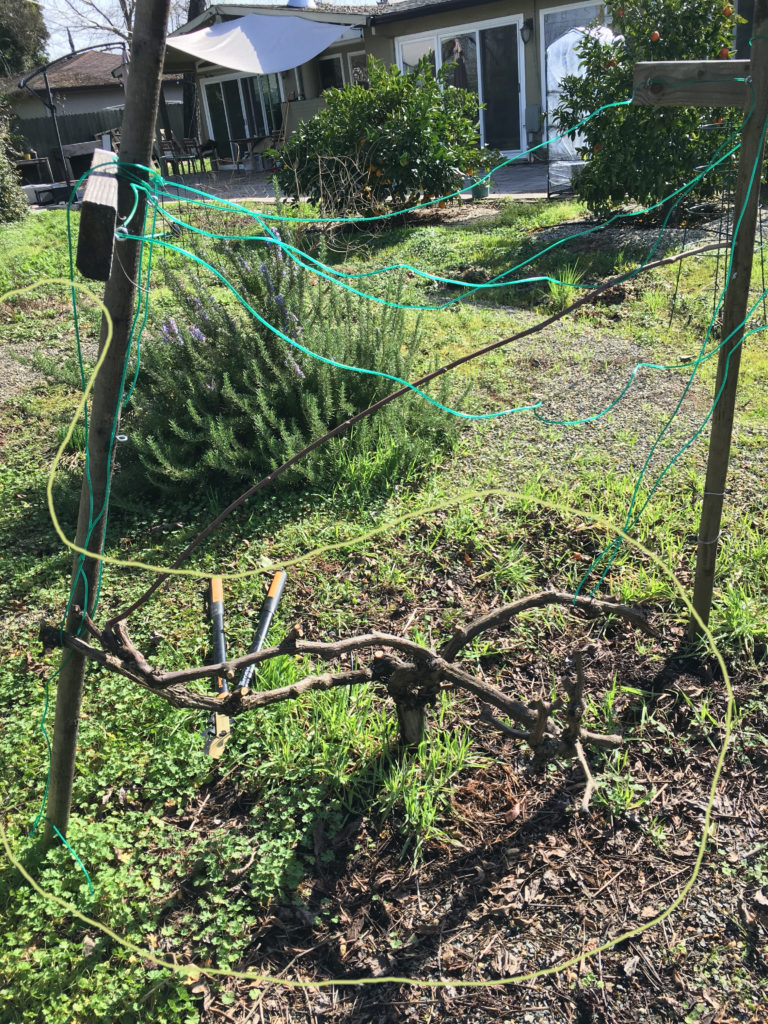
We pulled up the lingering grape and cleared that area and covered it with mulch. We tried to plant tomatoes in the ground in that area last year, but the squirrels kept digging and messing with the new plants, and they didn’t do so well. So finally this year we decided to go ahead and build raised planters with squirrel protection!
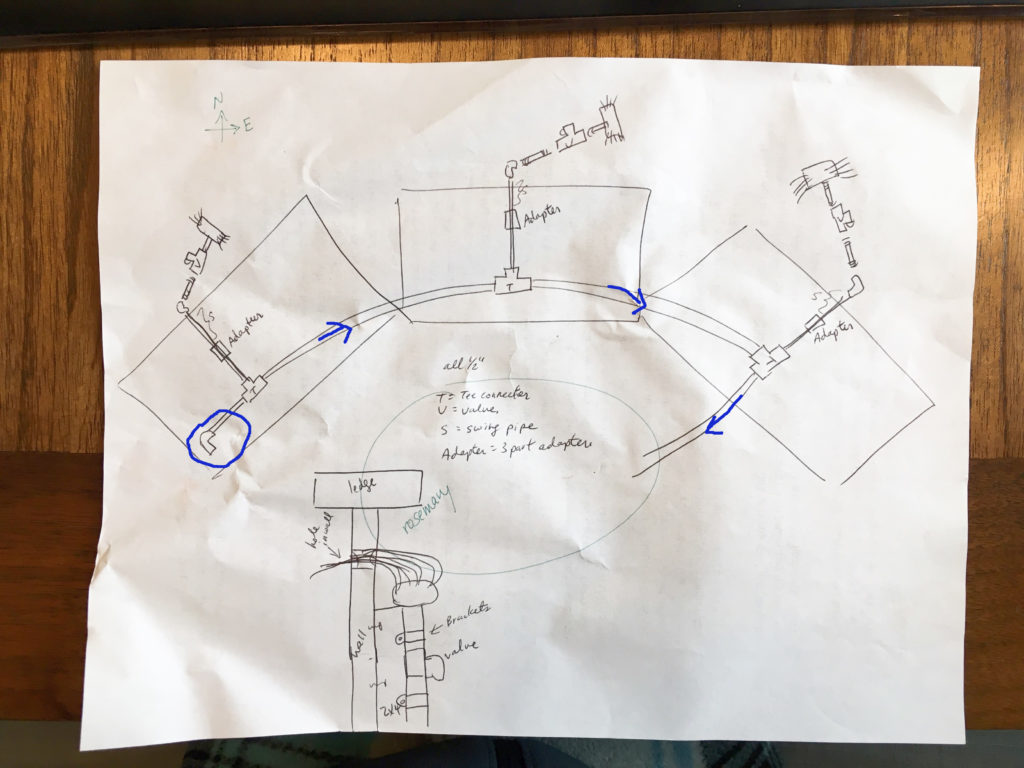
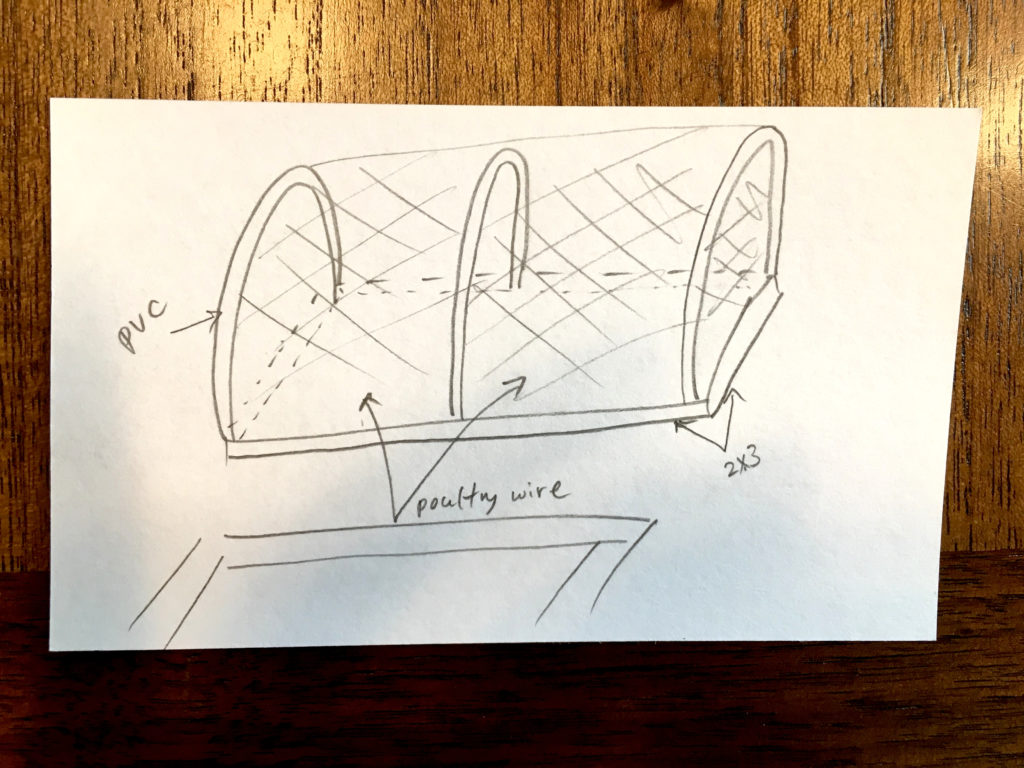
Here’s the plan: We’d like to have three planters here laid out as a half of a circle around the center of the area where the rosemary lives (the bushy green plant in the center of the left image above). The back fence of the yard is on the north side, so here’s our diagram, viewed as from the front of the yard, facing the back fence (as in the right image above):
Just FYI, we’re currently working on this, so this is our plans, we’ll see if this turns out!
Details:
- 3 Planters: ~6.5′ long x ~3.5′ wide x ~16.5″ high,
- Run irrigation through with independent valve and control for each planter.
- Covers made with 2×3″ studs, pvc pipes, and poultry wire.
Materials for 3 planters (prices as of Feb 2019):
- 36- Planter wall blocks *3 blocks tall each corner ($3.08/ea)
- 18- 2x6x10 studs *each cut into 6′, 3′, and remnant at the store for easier transport ($6.09/ea)
- 12- 1/2″ 3 feet rebar ($3.75/ea)
- 3 cubic yards of 50/50 compost/topsoil mix ($45/yd^3)
- Total: $400.50 (not including tax)
Materials for irrigation:
- 1-4pk of 1/2″ barbed Tee ($2.97/pk)
- 1-100ft of 1/2″ irrigation tubing ($9.97)
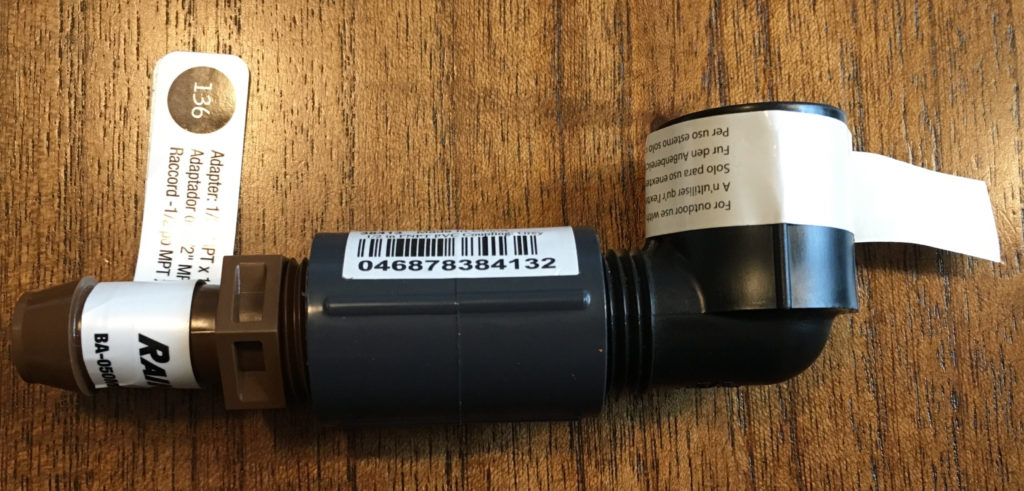
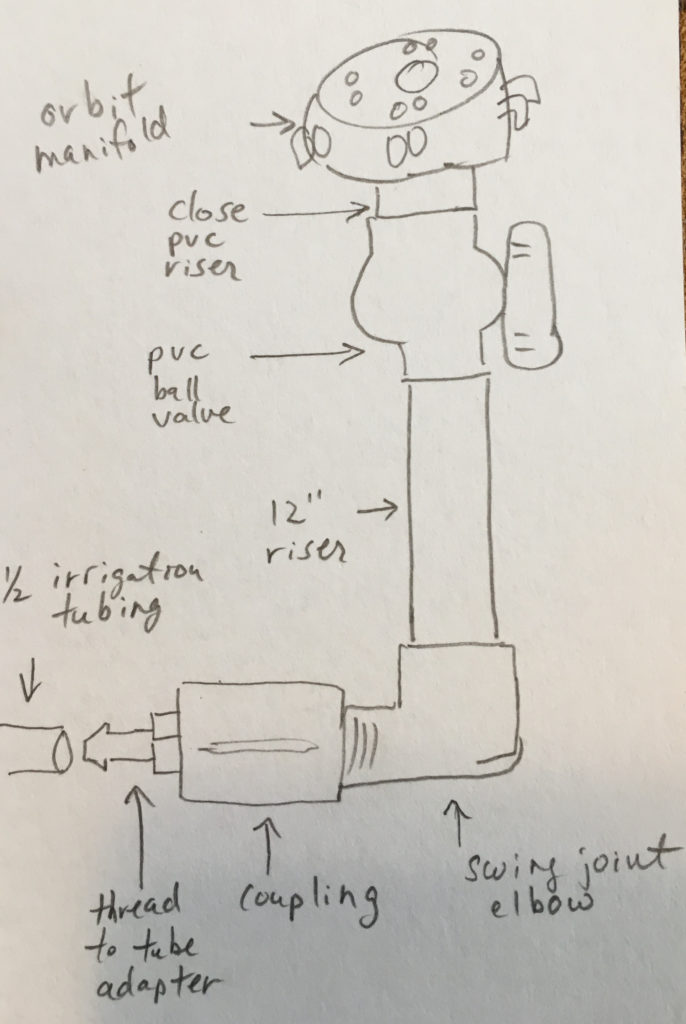
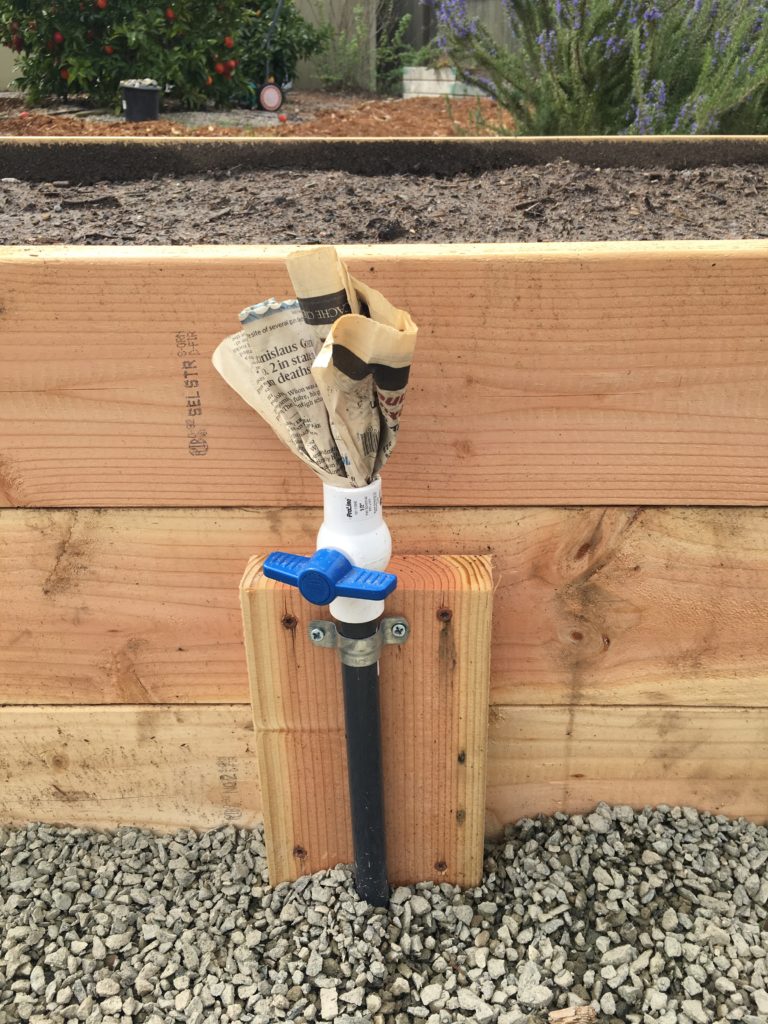
- 3- adapters from 1/2″ tubing to 1/2″ risers *See image below. This consisted of an
1/2 in. Male Pipe Thread to Drip Tubing Adapter, a
1/2 in. PVC FNPT Coupling, and
1/2 in. MNPT x FNPT Swing-Joint Elbow. Three sets of this was $8.58. - 3- 12″ risers ($1.37/ea)
- 3- Orbit 1/2 in. x Close PVC Riser ($0.42/ea)
- 3- 1/2 in. PVC Sch. 40 FPT x FPT Ball Valve ($2.92/ea)
- 3-Orbit 8-Port Adjust Flow Manifold ($6.98/ea)
- *optional: 1-10pk 1/2″ galvanized pipe strap ($1.98/pk)
- Total: $58.57 (not including tax)
Everyone’s irrigation needs are so different. We ended having to go from irrigation tubing to risers because we wanted to keep the whole setup curved.
* note: We were limited to what was available at our local hardware store. There may be a part available online that allows a more elegant solution. However, we try to avoid purchasing parts that we can’t fit together on the spot.
We made sure to support the irrigation tubing with gravel around it in the ground, with soil above. In our case, this is what we have for each planter:

Progress:
Here we begin by leveling the blocks. Having a couple pieces of lumber cut to size really helped us make sure the blocks were level.
Starting… Finishing… Inside
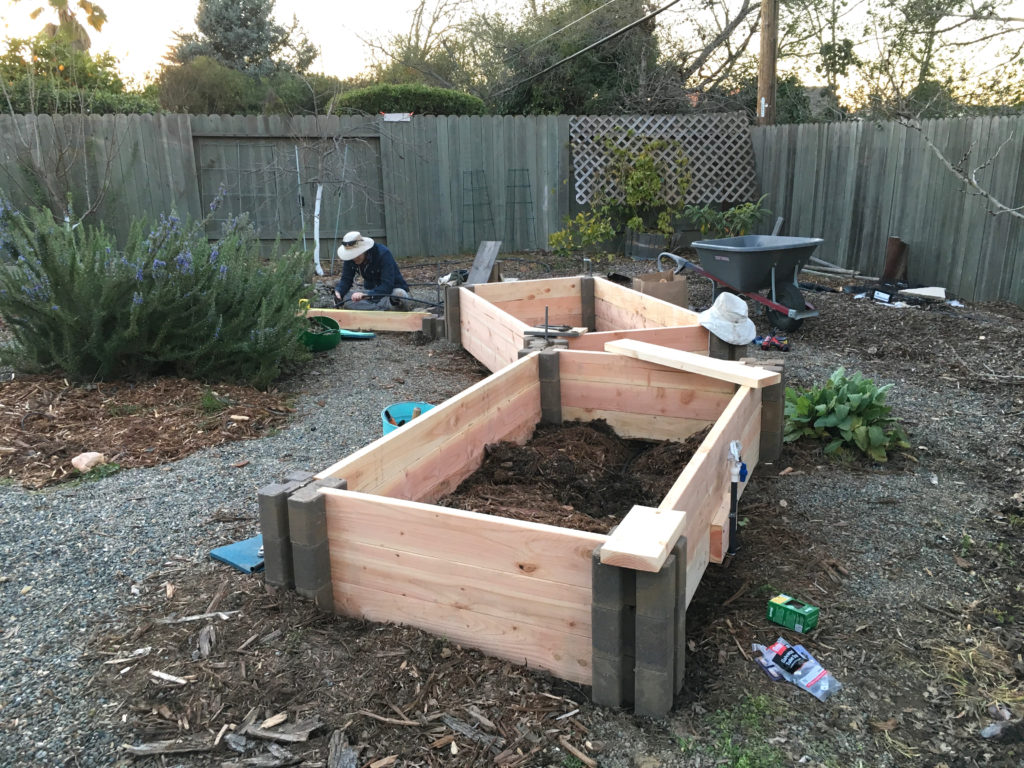
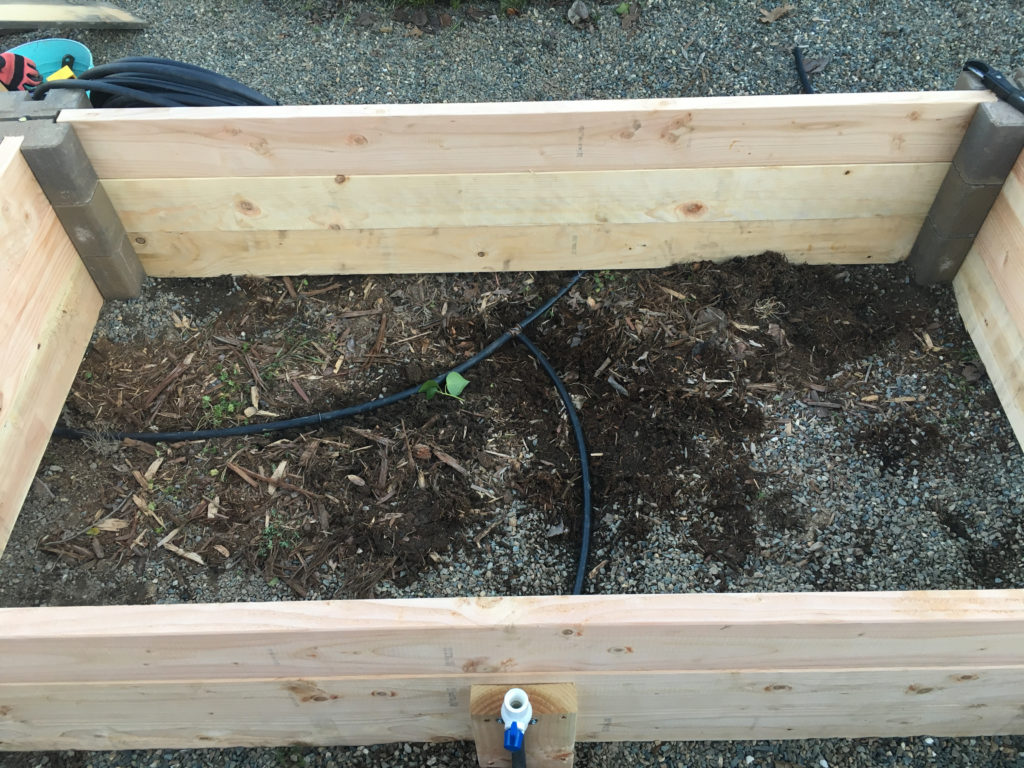
This definitely took us the whole weekend once we got all the stuff. You might notice that we used the ~12″ stud remnant as a support for the irrigation risers. We got 1/2″ galvanized pipe straps to secure the 12″ riser adjacent to the ball valve in order to minimize movement to the setup when we operate the valve.
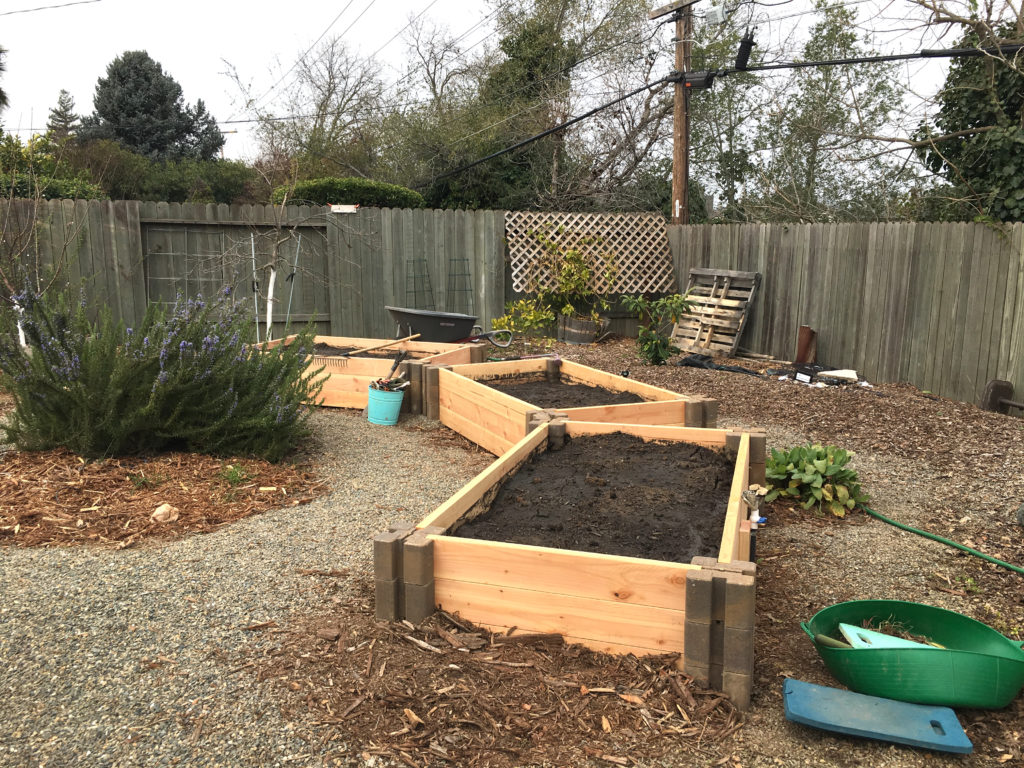
Here’s what it looks like with the planting mix added!
Next up would be to finish the exposed part of the irrigation and work on the squirrel covers. Unfortunately, it’s raining now, so we’ll have to wait for dry weather to continue. Fortunately, since it’s raining, the squirrels are leaving the planters alone. Hopefully we won’t need to sift through the dirt for lots of oak and other squirrel treasures!
*note: we ended us using almost all of the 3 cubic yards of planting mix!
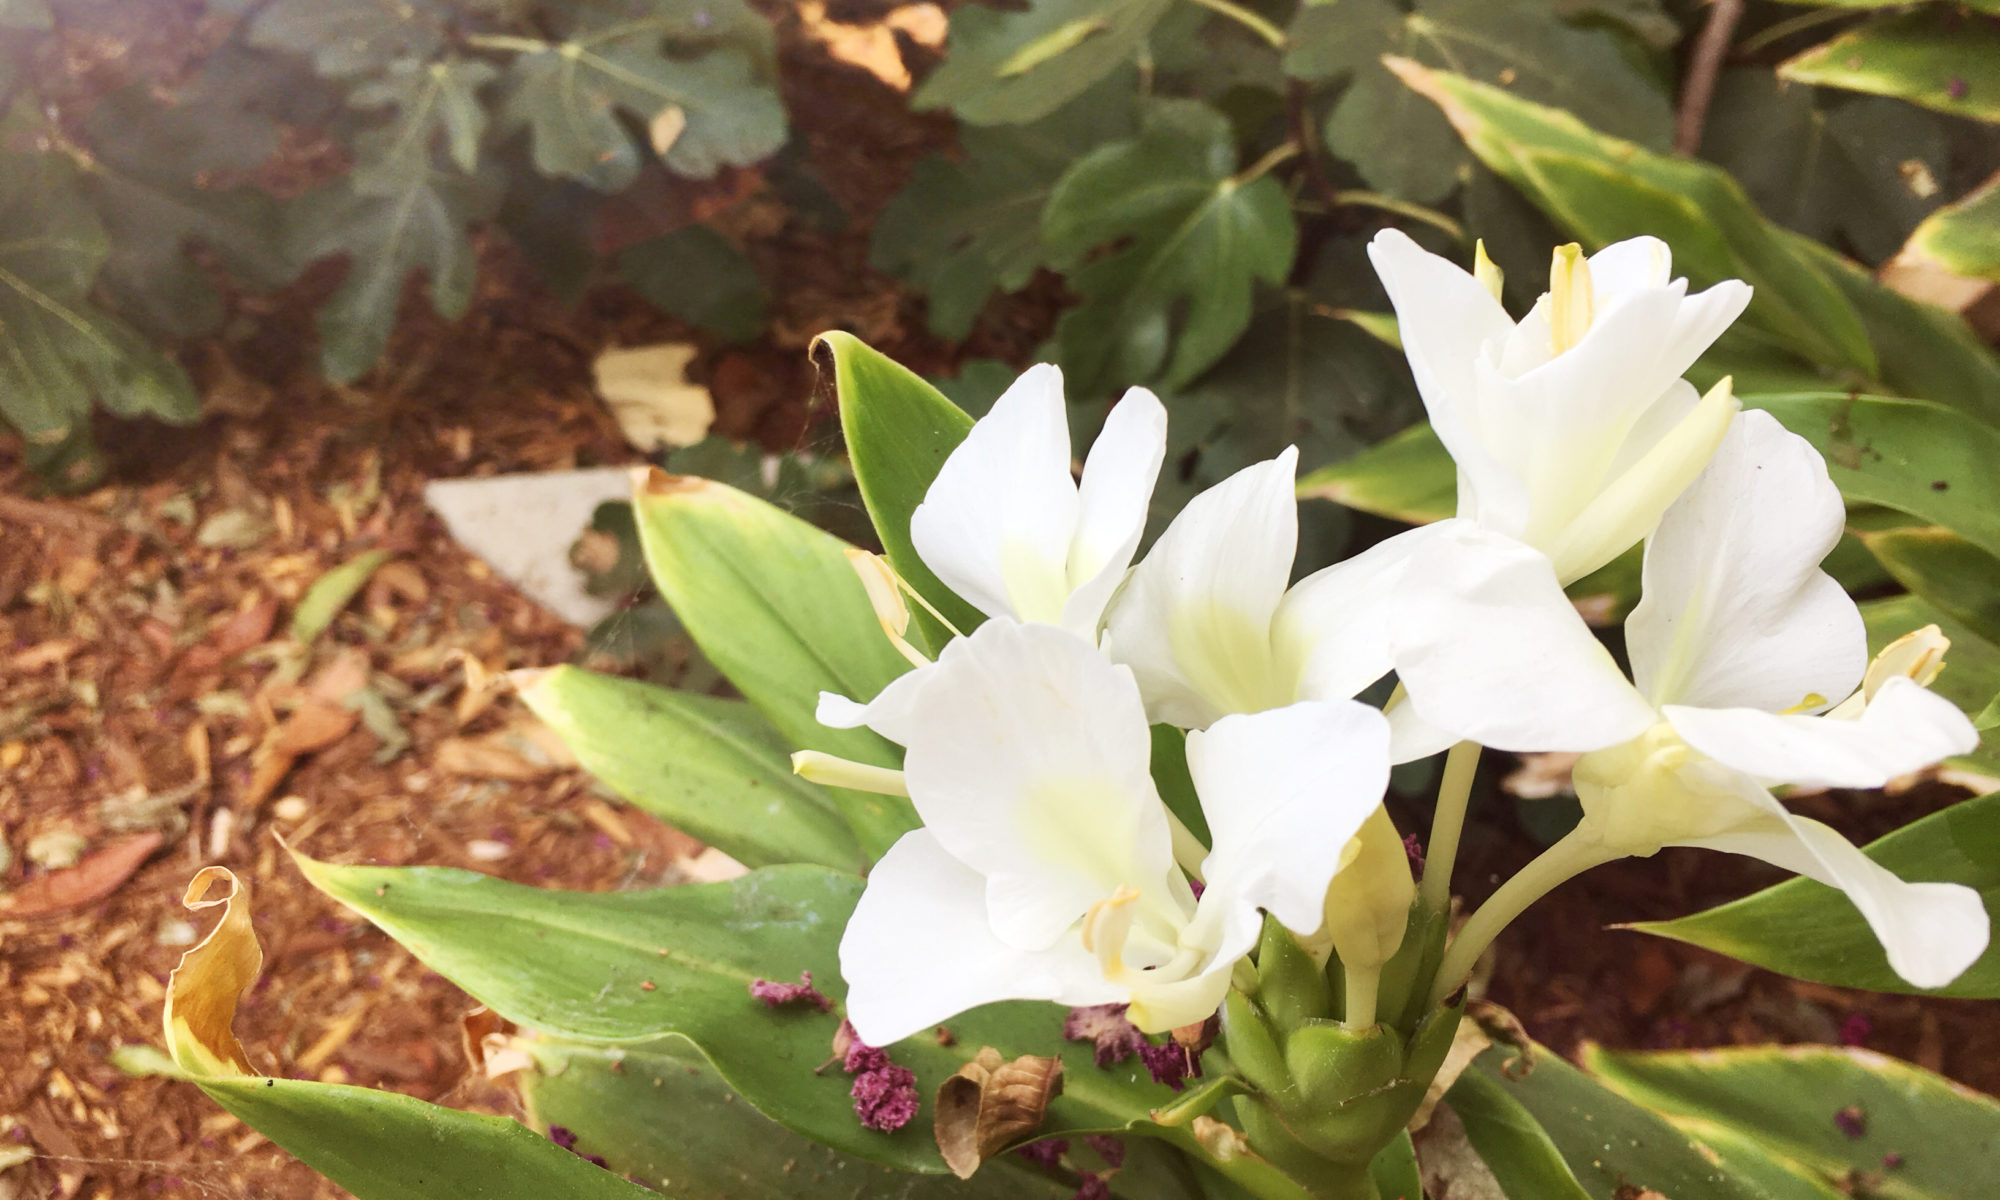
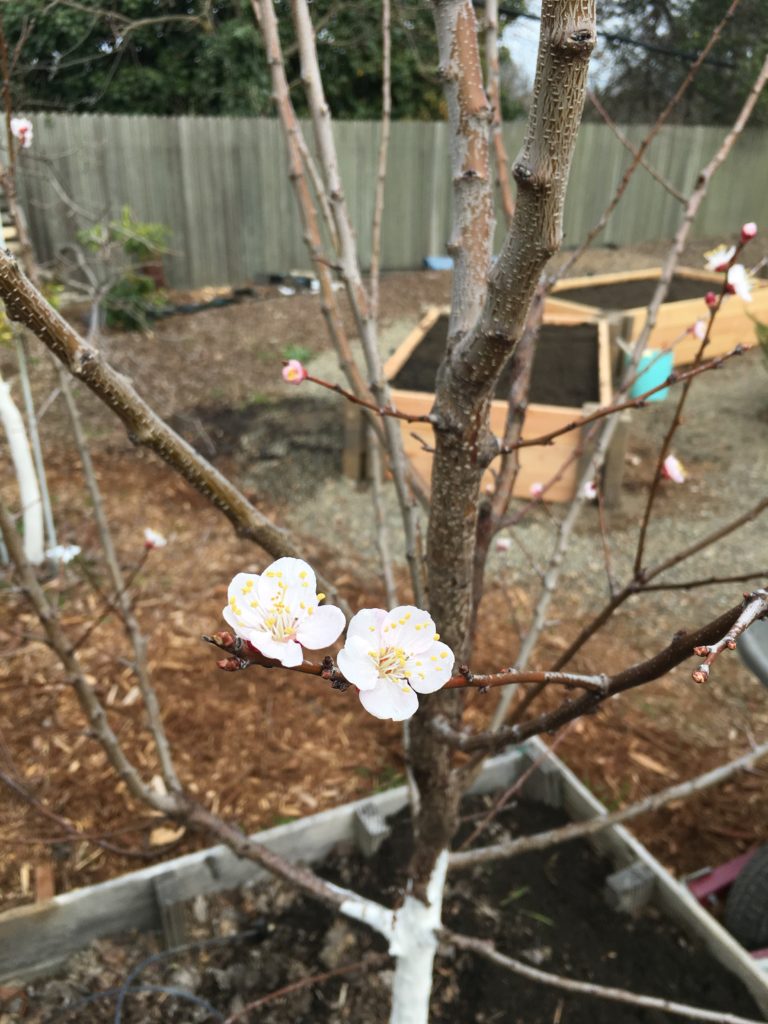
Meanwhile our apricot is flowering, and it cheers us on as we work on putting our planters together.
Squirrel protection, or planter covers next!